 YouTube!
Zmodo zm-w0002 First Look
Table of Contents
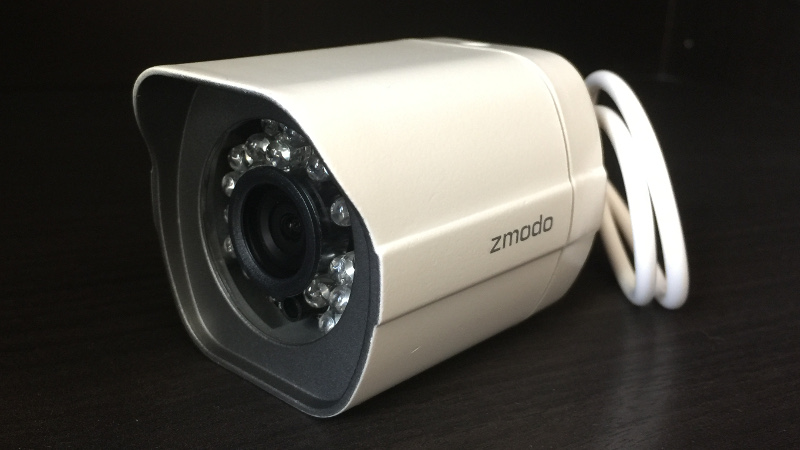
zm-w0002
The zm-w0002 is a super-cheap outdoor security camera that you can pick up on Amazon in a 4-pack for $99.99.

I know what you’re thinking… Dude, you can’t shake a stick at 4 weatherproof wifi cameras delivered to my door for $100. Unfortunately, you can. These cameras are so cheap because Zmodo has removed every feature you might want to setup a secure locale security system and instead ships all of your data to their cloud service for later viewing on their proprietary mobile app. Out of the box, these cameras will not work with anything other than the proprietary kitsch they’re bundled with.
Luckily, it’s powered by the popular and well documented HiSilicon Hi3518 SoC (Datasheet, User Guide).
Setup Services
According to the Quick Start Guide, you’re supposed to power up your cameras, then download the MeShare App (iPhone, Android) which will walk you through creating a MeShare Account, transferring you network creds to your camera(s), and viewing your live streams on your phone. There’s no way I’m installing an app on my phone to access a “free” amorphous cloud service, nor am I sending my network creds or survalence data to said amorphous cloud service in the first place. So, let’s see what’s really going on.
While in setup mode, the camera broadcasts a wifi hotspot called ZMD_SAP. It assigns itself 192.168.10.1 and runs a DHCP server handing out addresses in the 192.168.10.2-100 range. Connecting a machine to the network and scanning the camera gives the following:
rcw@antec:~$ nmap -A -T4 192.168.10.1

Starting Nmap 7.40 ( https://nmap.org ) at 2017-02-14 18:04 PST
Nmap scan report for 192.168.10.1
Host is up (0.026s latency).
Not shown: 996 closed ports
PORT     STATE SERVICE   VERSION
4444/tcp open  krb524?
/assets/zm-w0002-tcp open  http-alt?
8086/tcp open  http      BusyBox httpd 1.13
|_http-title: User login authentication
8087/tcp open  http      BusyBox httpd 1.13
|_http-title: User login authentication
Service Info: OS: Linux; CPE: cpe:/o:linux:linux_kernel

Service detection performed. Please report any incorrect results at https://nmap.org/submit/ .
Nmap done: 1 IP address (1 host up) scanned in 172.82 seconds
rcw@antec:~$
I haven’t figured out what’s going on with 4444 yet and we’ll talk about 8000 later. For now, let’s focus on the two httpd servers running on 8086 and 8087.
:8086
Pulling up 192.168.10.1:8086 in a browser gives us a tidy little web form, with the requisite spelling error on the Concle button.
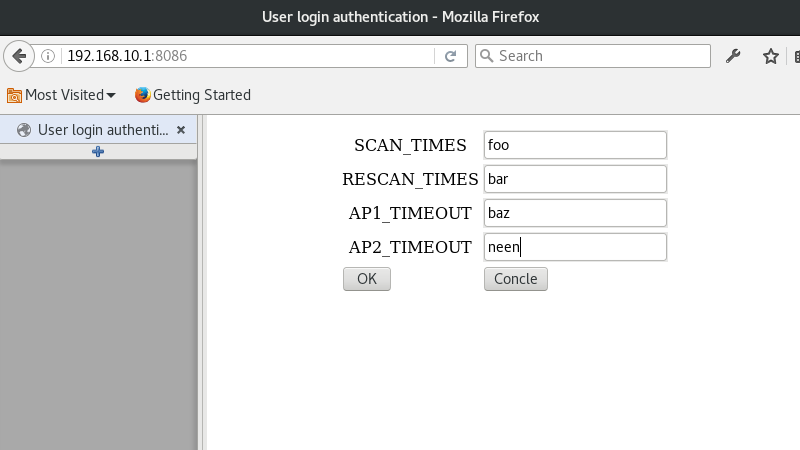
It looks like it’s asking for numerical input, so I figured I’d feed it some non-numeric strings and see what happens.
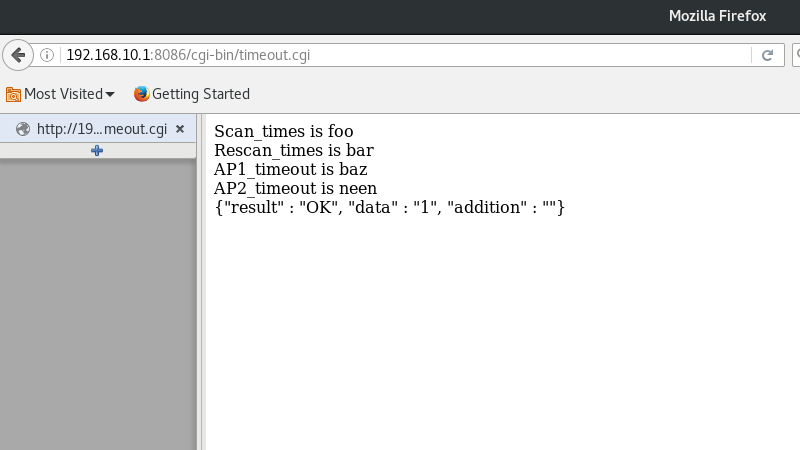
Success! We’ll see later that this form updates a conf file on the filesystem with what appears to be no validation whatsoever. I need to do a little exploring here to see if I can exploit this form to start telnetd (which is available on the system, just not running by default) and avoid tearing the rest of my cameras apart to access their serial consoles.
:8087
Pulling 192.168.10.1:8087 in a brower gives us another tidy little web form, once again with the Concle button.
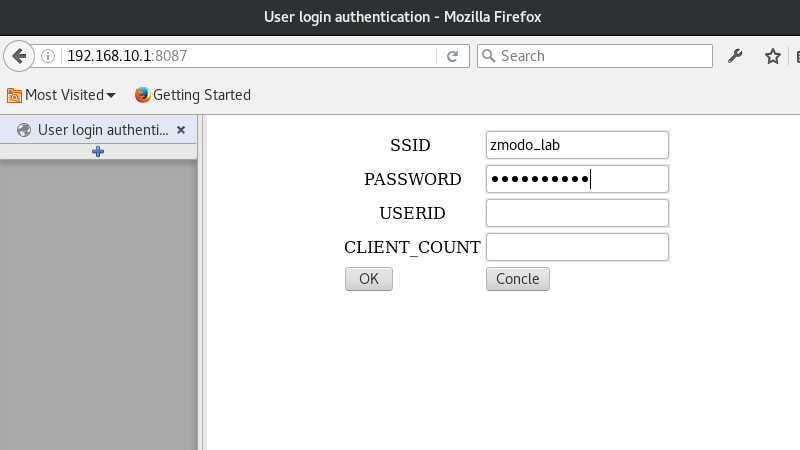
Now this looks more interesting. I setup a little lab network without any uplink and attempted to connect. I’m not sure what USERID or CLIENT_COUNT are about, but I figured the lack of input validation wouldn’t care if I left them blank.
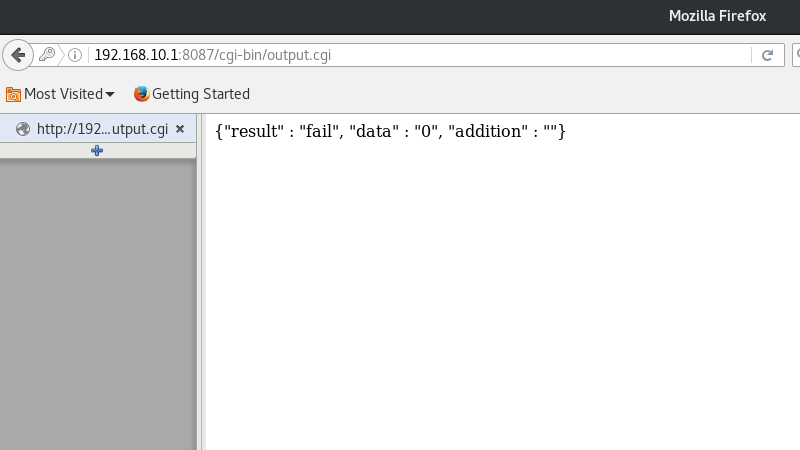
Surprise! It failed. Sad. I guess we need some values after all. Let’s try foo and bar as before.

Success! I haven’t yet found which files this updates, but at this point, the camera will stop broadcasting ZMD_SAP and will join your provided network, asking for an address over DHCP. Keep in mind that these cameras only have 2.4GHz radios (RTL8188EUS to be exact), so they will not see your 5GHz networks. If all went well and it successfully joined your network, the camera will now switch from setup mode to production mode.
Production Services
Let’s start by scanning the camera from a machine on the same lab network:
rcw@burner:~/Projects/zmodo$ nmap 192.168.1.170

Starting Nmap 7.40 ( https://nmap.org ) at 2017-02-14 18:40 PST
Nmap scan report for 192.168.1.170
Host is up (0.032s latency).
Not shown: 998 closed ports
PORT     STATE SERVICE
4444/tcp open  krb524
/assets/zm-w0002-tcp open  http-alt

Nmap done: 1 IP address (1 host up) scanned in 0.65 seconds
rcw@burner:~/Projects/zmodo$
Sad. It looks like our httpd servers went away. I guess we’ll have to dig further into what we do have.
:8000
Thanks to the Zmodo - Local Controller project over on Hackaday, we know that most Zmodo cameras respond to commands that look vaguely like 55 55 aa aa 00 00 00 00 00 00 00 50. I created an ugly little perl script to scan the last two bytes, sending every possible combination and listening for responses. I noticed that the middle 00 bytes don’t need to be 00, but I haven’t figured out what they really are yet, so I’m leaving them alone in this scan. Every response starts with a header very similar to the command sent. Sometimes some of the 00 are changed, but the 55 55 aa aa is always there and the last two bytes are always the same as the command. Here’s a very incomplete list of commands and responses:
| Command | Response | Bin |
|---|---|---|
| 00 91 | Looks like a config dump. Has some directory names as well as the wifi ssid, channel, and password. Also contains whatever it is that 00 9c sets. | 0091.bin |
| 00 98 | Model number, something that looks like a UID, a 10-digit identifier that is also physically screened on the bord, and two version strings. | 0098.bin |
| 00 99 | Binary I haven’t figured out yet. Contains whatever 00 9c sets | 0099.bin |
| 00 9c | Sets something. This guy thinks it’s the MAC address, but I’ve been unable to confirm. | |
| 01 9c | Returns whatever was set by 00 9c | |
| 11 90 | Some version strings | |
| 12 a1 | Wifi site survey | |
| 36 96 | An AES key stored in a file named “key” on the filesystem. A quick google search for the key on my test device didn’t turn up any hits, so it may be unique per device. I’ll update this section once I get inside another camera. | |
| 71 7a | Wifi channel |
Physical Teardown
Poking at the network is fun and all, but let’s tear this thing apart…
Yup, that’s a desiccant pouch like you find in beef jerky stuffed in there. I guess that’s one way to keep things dry.

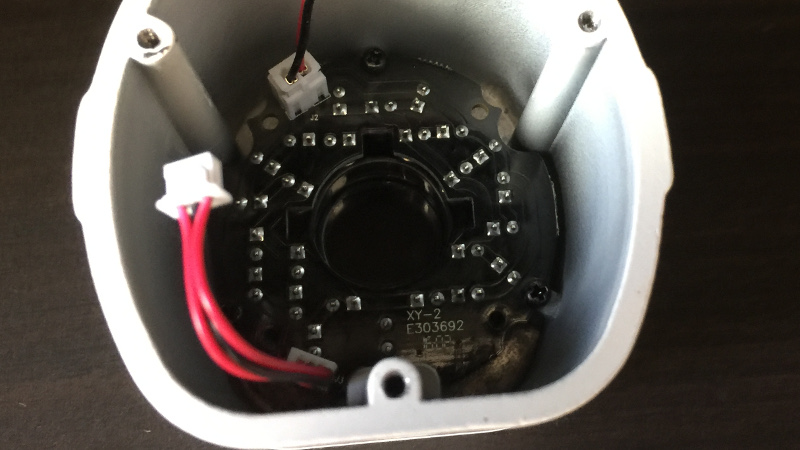
I haven’t investigated the IR LEDs much yet. Will update here if I ever get that far.
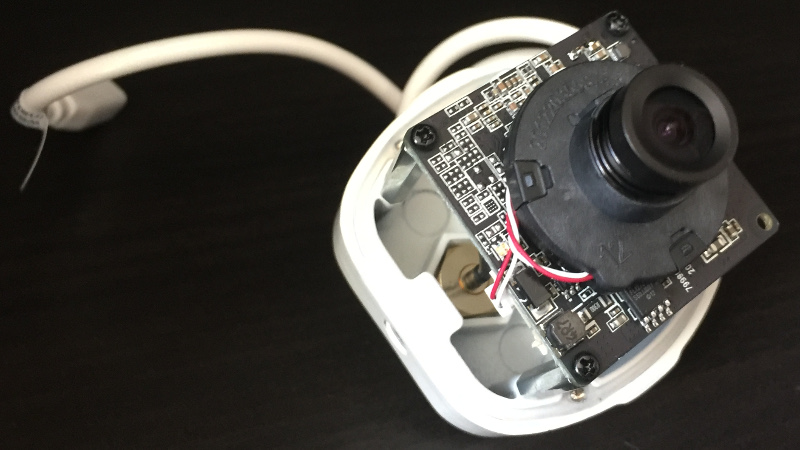
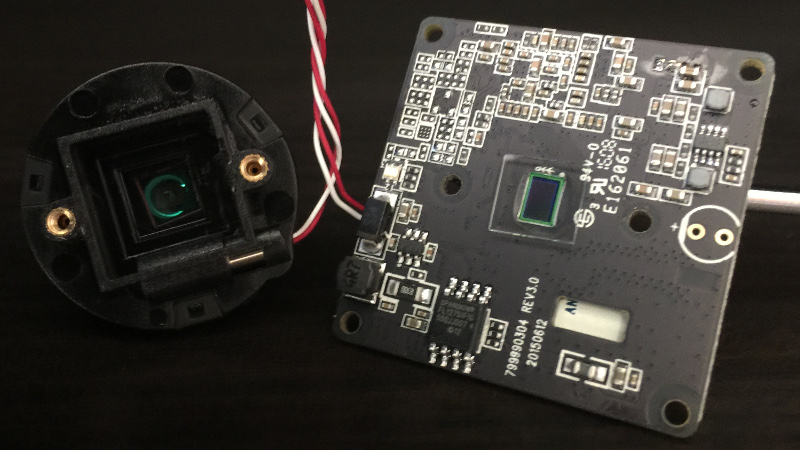
The main camera body, still in one piece.
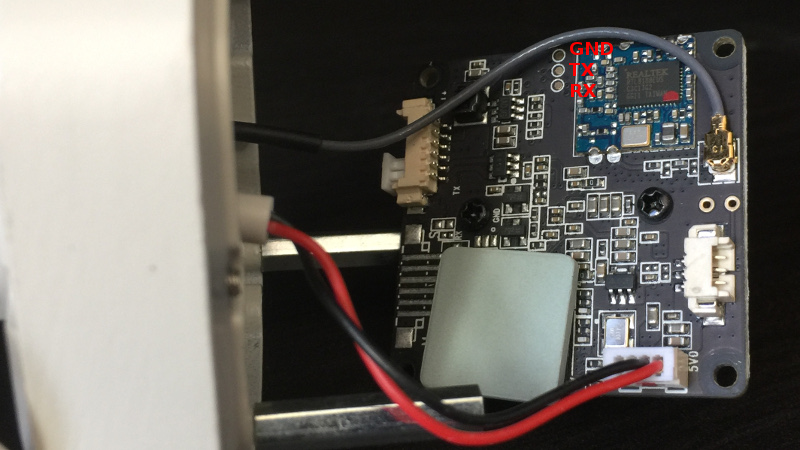
Here’s the fun side of the board. A few points of note:
- The three pads in the upper middle are an active RS232 port.
- The chip in the upper right is a RTL8188EUS 2.4GHz radio.
- The gray lead right next to the radio is its antenna.
- The empty headers in the picture are where the IR LEDs hook up.
- There’s a 4-pin USB header, but only power and ground are connected. I haven’t yet tried connecting the data lines to see if it’ll talk to an outside computer.
- The screws in the middle hold the lens assembly to the board.
- The sloppily installed ceramic heatsink is covering the Hi3518 SoC.
Here, we can see the surface-mounted imager under the lens assembly. Also note 79990304 REV3.0 screened on the board. We get that number back from a 00 98 request as well.
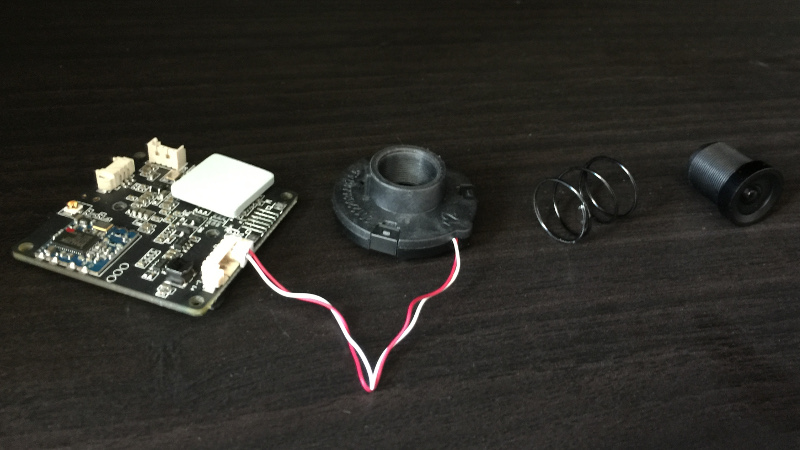
You can adjust the focus of the lens by screwing it into or out of its housing. The spring just keeps everything tight.
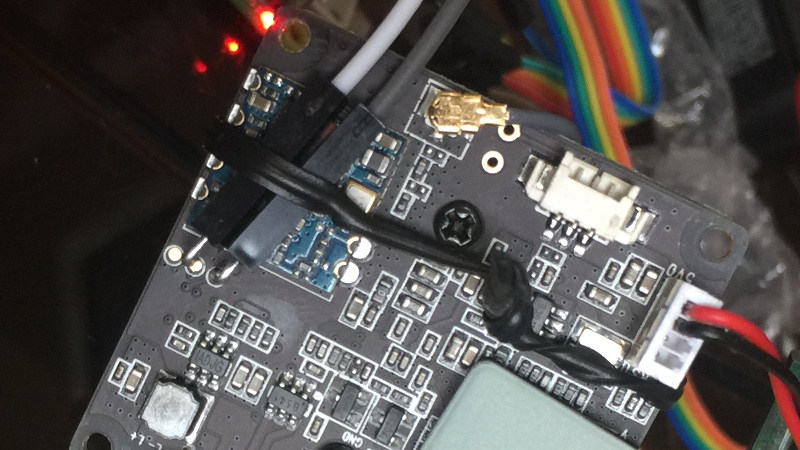
I didn’t feel like soldering anything to the board in that tiny space, so I just bent a couple female to male jumper wires 90-degrees and bread tied them to the board. I was out of rubber bands. Don’t judge. The other end is a cheap CP2102 USB<->RS232 adaptor feeding GtkTerm 115200-8-N-1.
Building Software
Enough fooling around with what’s already there. Let’s run our own code on this thing.
Toolchain Setup
While there are lots of folks out there talking about the Hi3518 SDK, actually finding a copy of it isn’t so easy. I’m not sure what the deal is. All of the official links from HiSilicon are dead, so I don’t know if they would have contained the SDK or not. The only thing I could find out there was one guy who says that he got the SDK along with the Hi3518 board when he ordered one. At any rate, you can get the SDK here, but be warned, it’s an anonymous MEGA upload. I didn’t do the upload, but it is the SDK that I’m using. I cannot vouch for the cleanlyness / health of the SDK and it does ask for root access (to access /opt) as part of the install. I would advise installing the SDK in a dedicated / disposable VM, especially if you get it from the MEGA link.
At any rate, setting up a toolchain is fairly straightforward, but I’m lazy, so I googled around and found Nemon’s IPR1631X page where he outlines the steps. Continuing in my laziness, I wrote a little bash script to setup the toolchain for me. The whole thing should run with no errors and at the end, you’ll have the arm-hisiv100-linux toolchain available in your $PATH.
Dropbear (SSH)
Out-of-the-box, we already have telnetd and ftpd available and we’re living on a local lab network, so dropbear is a little unnecessary, however, I’m already pretty familiar with cross-compiling it from previous projects and it’s a great test to see if the toolchain is working. Of course I put together a little bash script to build dropbear just the way I like it. After running the script, you’ll find a dropbearmulti binary in dropbear-2016.74/ which will run nicely on the camera.