Jacobsen Sno-Burst Carburetor Overhaul
A few months back, I picked up a Jacobsen Sno-Burst on Craigslist for $20. Surprisingly enough, it ran when I got it home. I used it happily for the first half of the season and had no problems up until today. I was slogging my way through the five inches of slush that was dumped on Milwaukee last night when the thing just died. It wasn’t its normal bog-out-and-die, it was just pum-te-pah—dead. Well, as normal, I ripped on the cord a couple of times. Unlike normal, I got nothing. After a little common troubleshooting, I determined that I was going to have to tear down the carburetor. I figured I could go online and get myself a manual, but found no such luck. Since there was no such luck, I figured I would fill the void. Please read this whole guide before starting work. It’s written in my order of operations and I came upon better ways of doing things part way through.
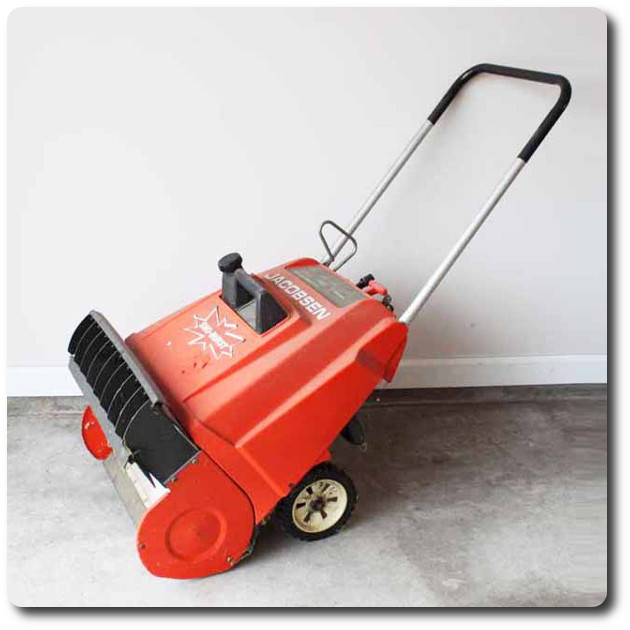
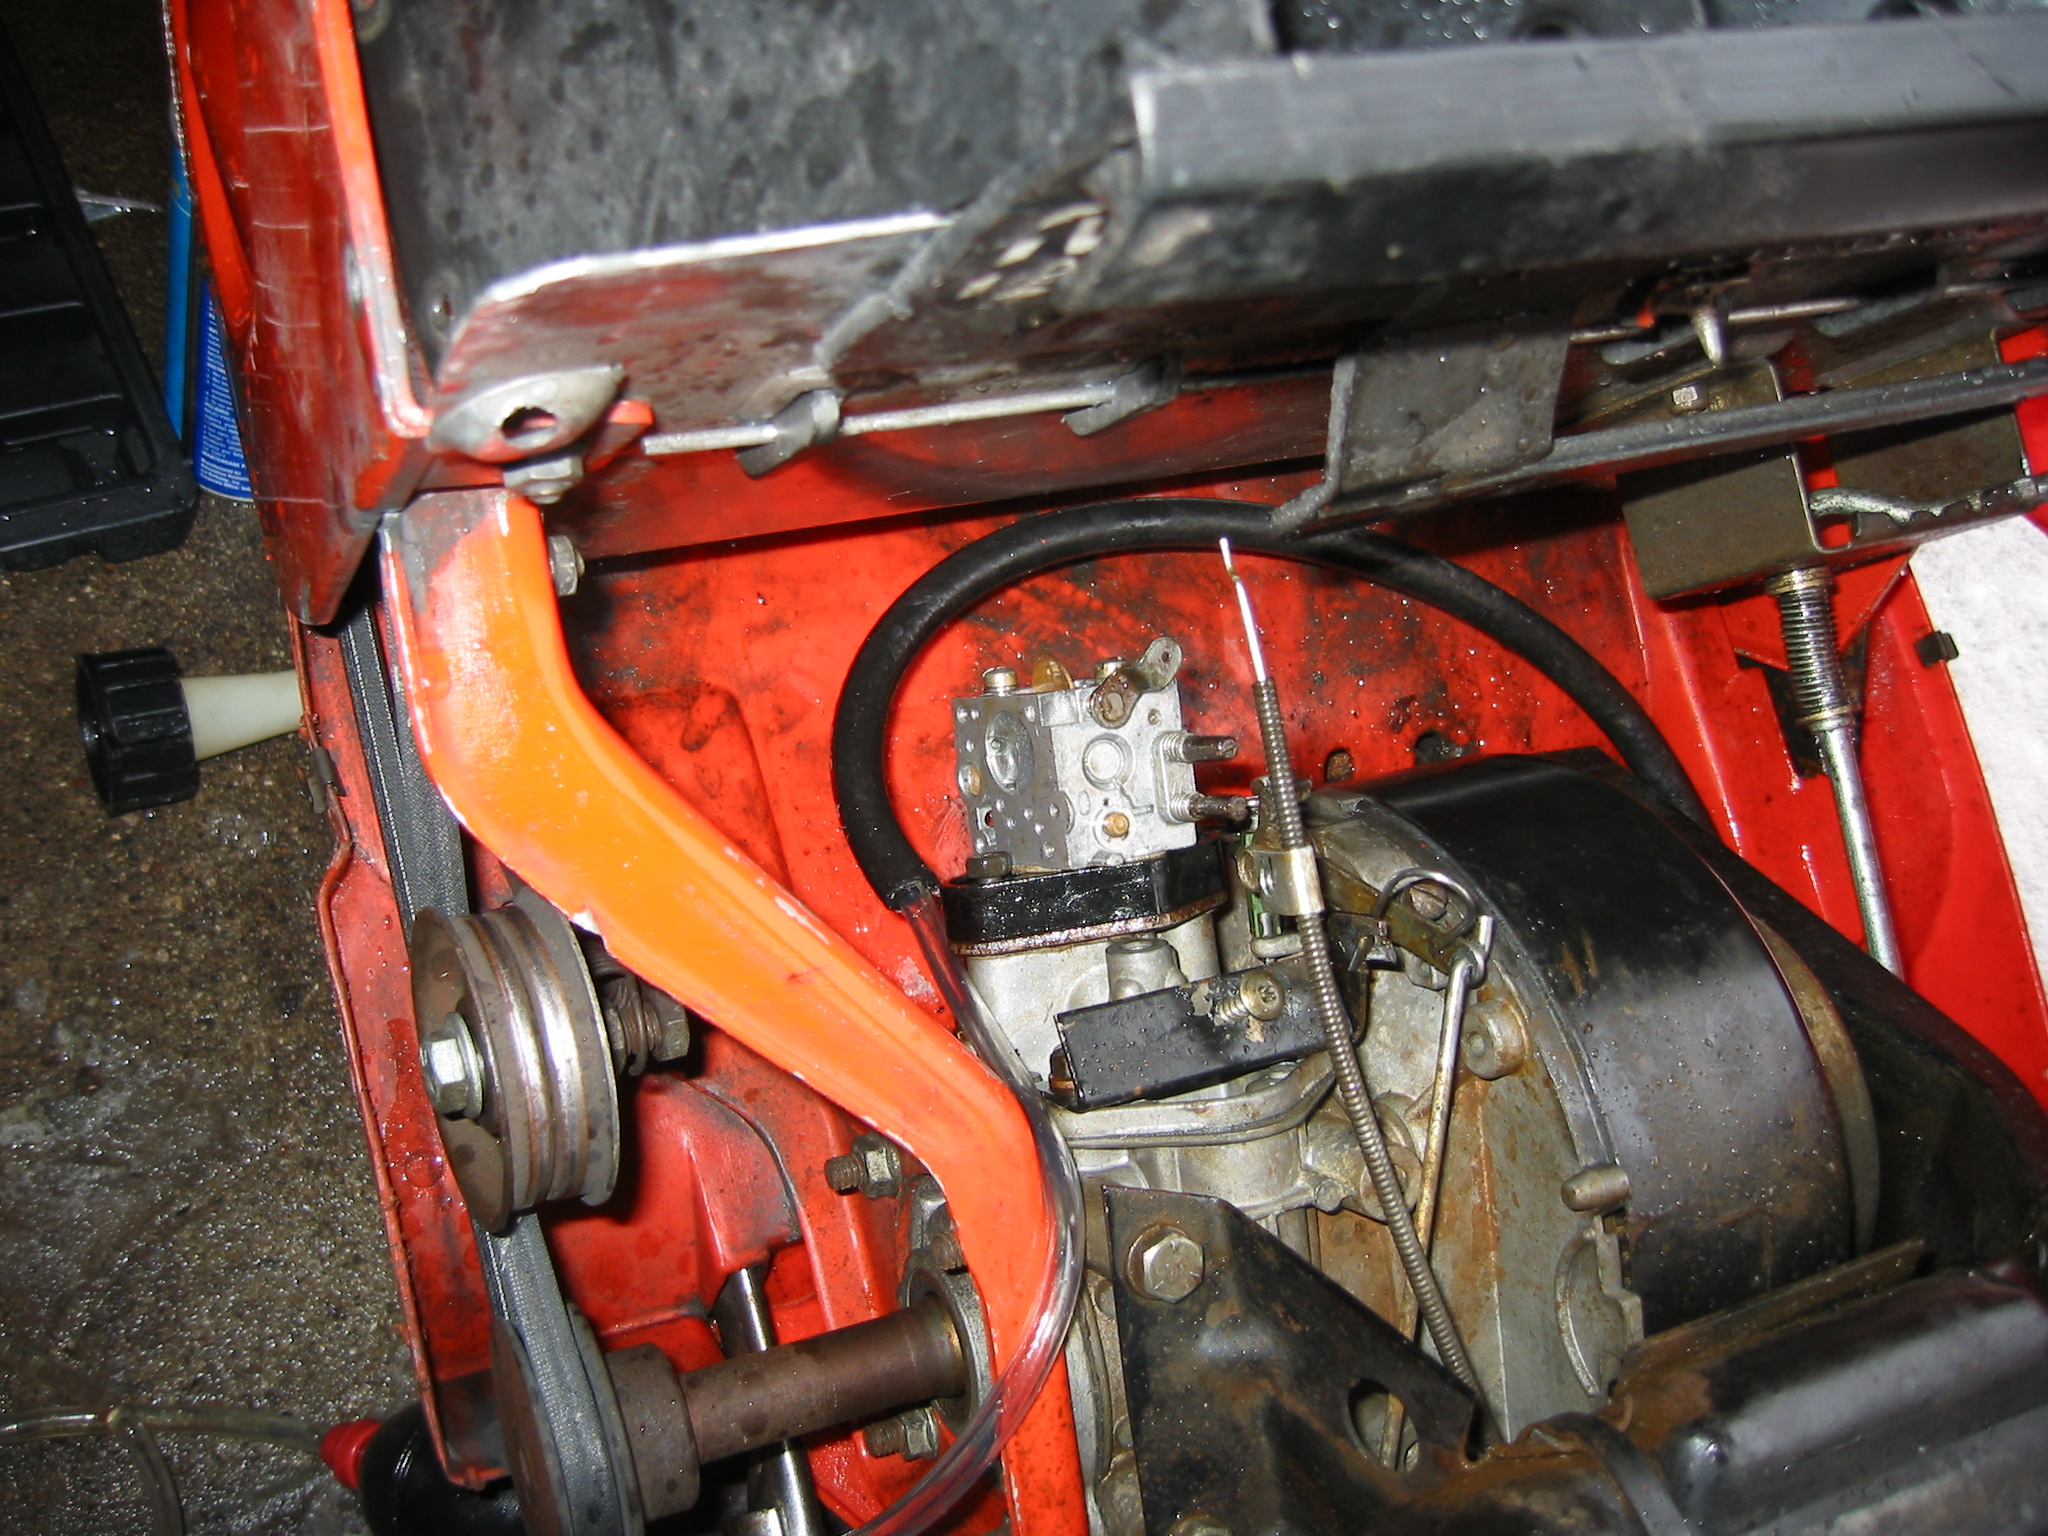
This is a Jacobsen Sno-Burst. If your snowblower looks like the one in the picture, then you’re probably in the right place.
The first thing you need to do is take off the top cover. In the case of my old beat-up unit, there was only one screw holding the cover on. I took it out and had a look at the engine. The carb is the little metal box on the front left from the driver’s position. On initial inspection, it looked like it was going to take some wizardry to get the carb off, but I think I handled it pretty easily.
Before you can do much else, you have to detach the paraphernalia from the carburetor. The choke cable is removed by simply unscrewing the phillips head screw that secures the cable, then weaseling the little hook out of its eye-hole by hand. If your machine has been in service as long as mine has, the fuel line is going to be a pain to remove.
(Don’t forget that you’re going to have gas running out when you disconnect / puncture the line. Even if you siphon out the tank, you’re never going to get the gas that is in the line itself. I chose not to siphon out the tank, but rather had a connecting hose on hand to let the gas run into a collecting tank.)
Unscrew the hose clamp and get it out of the way. I wound up using a pair of vice-grips and ripping the fuel line apart to get it off. Even so, it left a chunk of line still on the tap that I had to cut off with a pair of dikes. Other than being fused to the tap, the fuel line was in great shape and plenty long, so I just used a sharp knife and fashioned a new end for it.
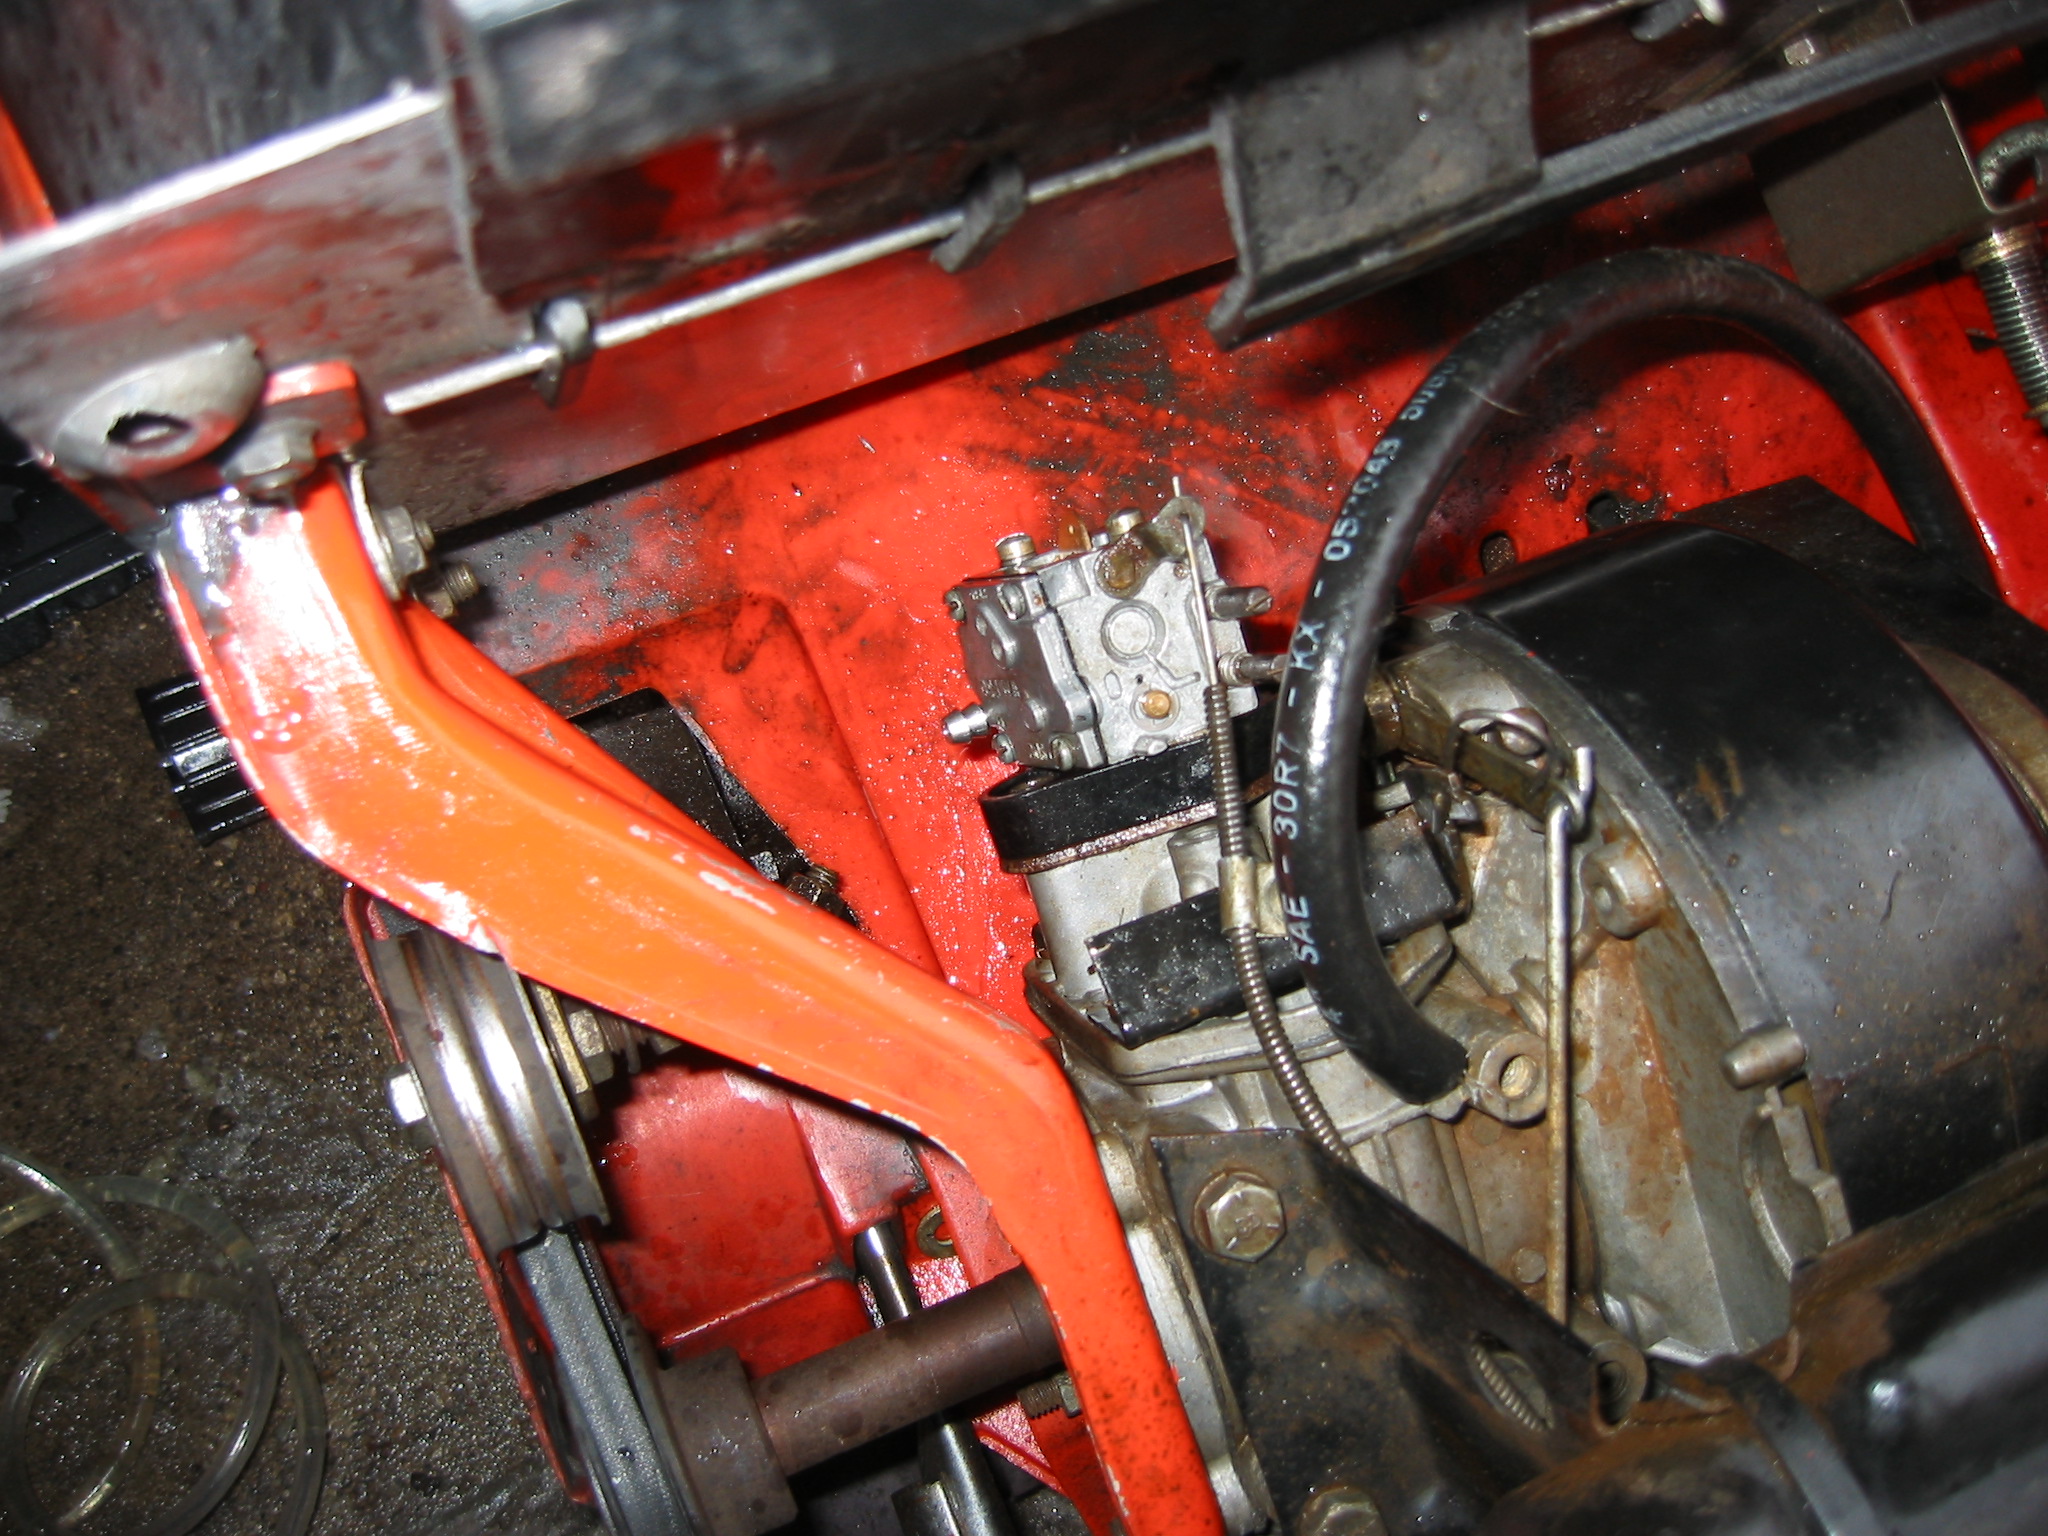
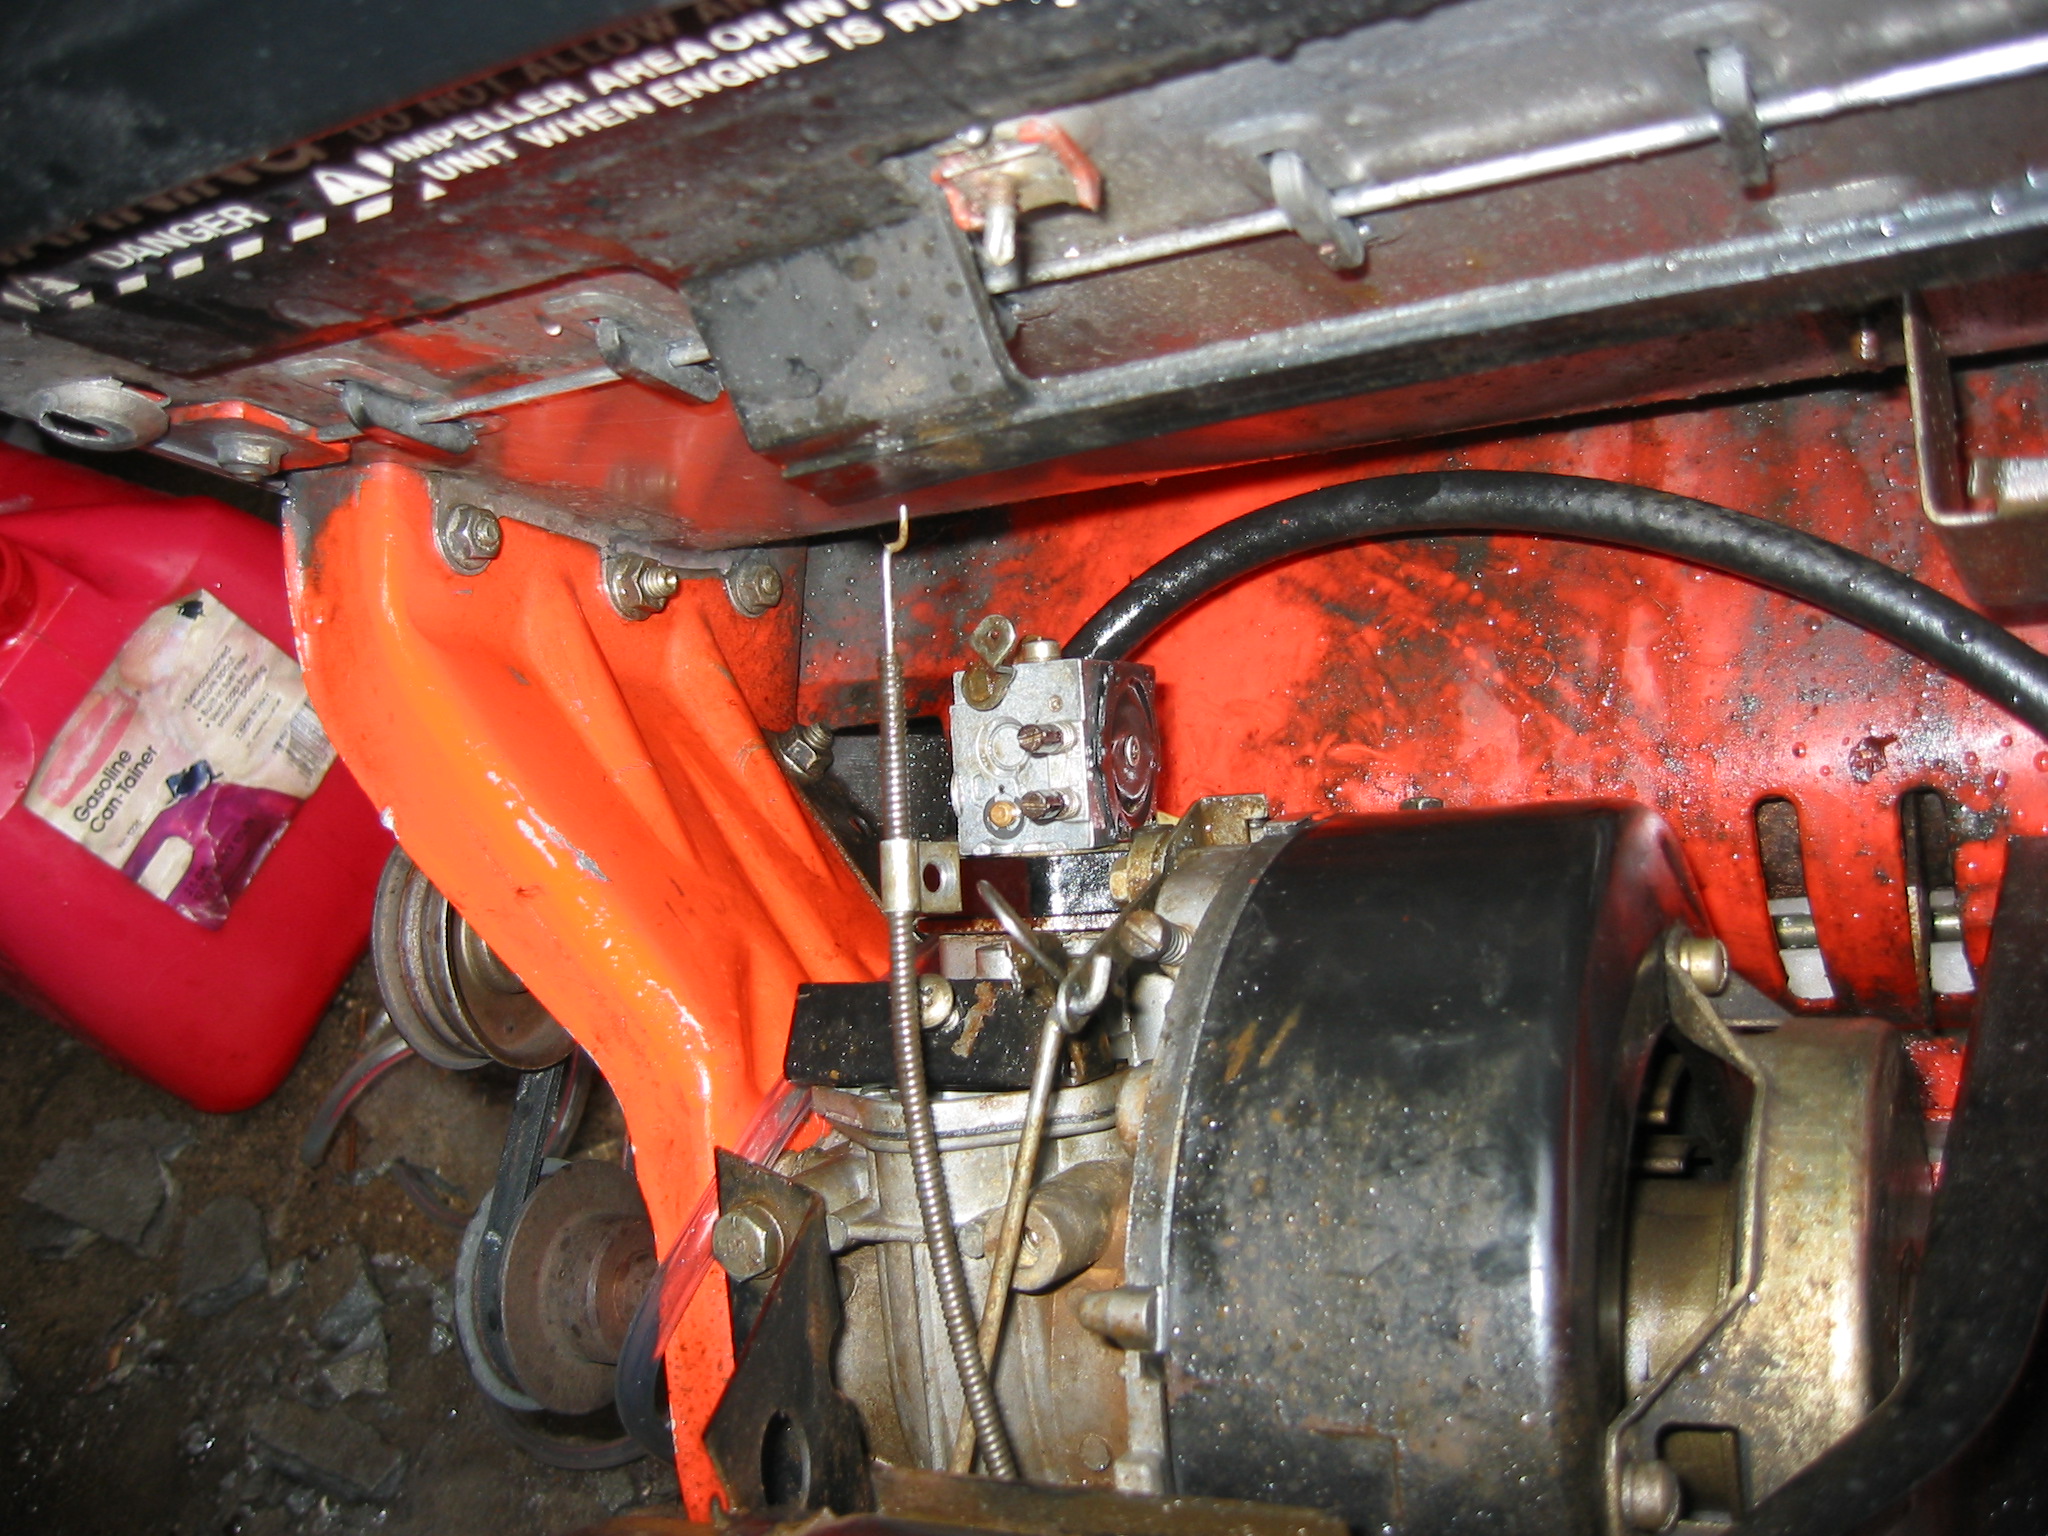
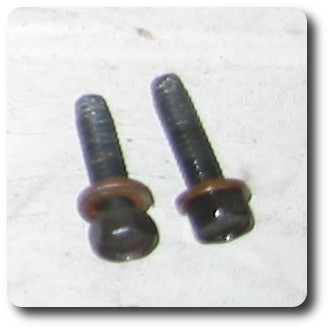
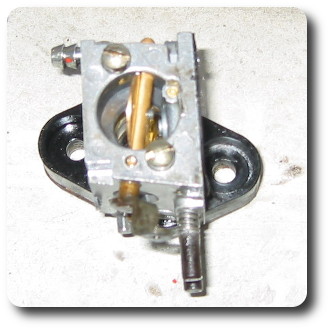
I decided that the best approach for carb removal would be to remove the carburetor and flange assembly intact from the intake body. There are two 3/8″ bolts that hold the flange to the intake body. Unfortunately, there is a little bit of difficulty getting to them. On the left side, the galley cover is in the way. (In the picture, you can also see the clear tube running from the fuel line to my collecting tank.)

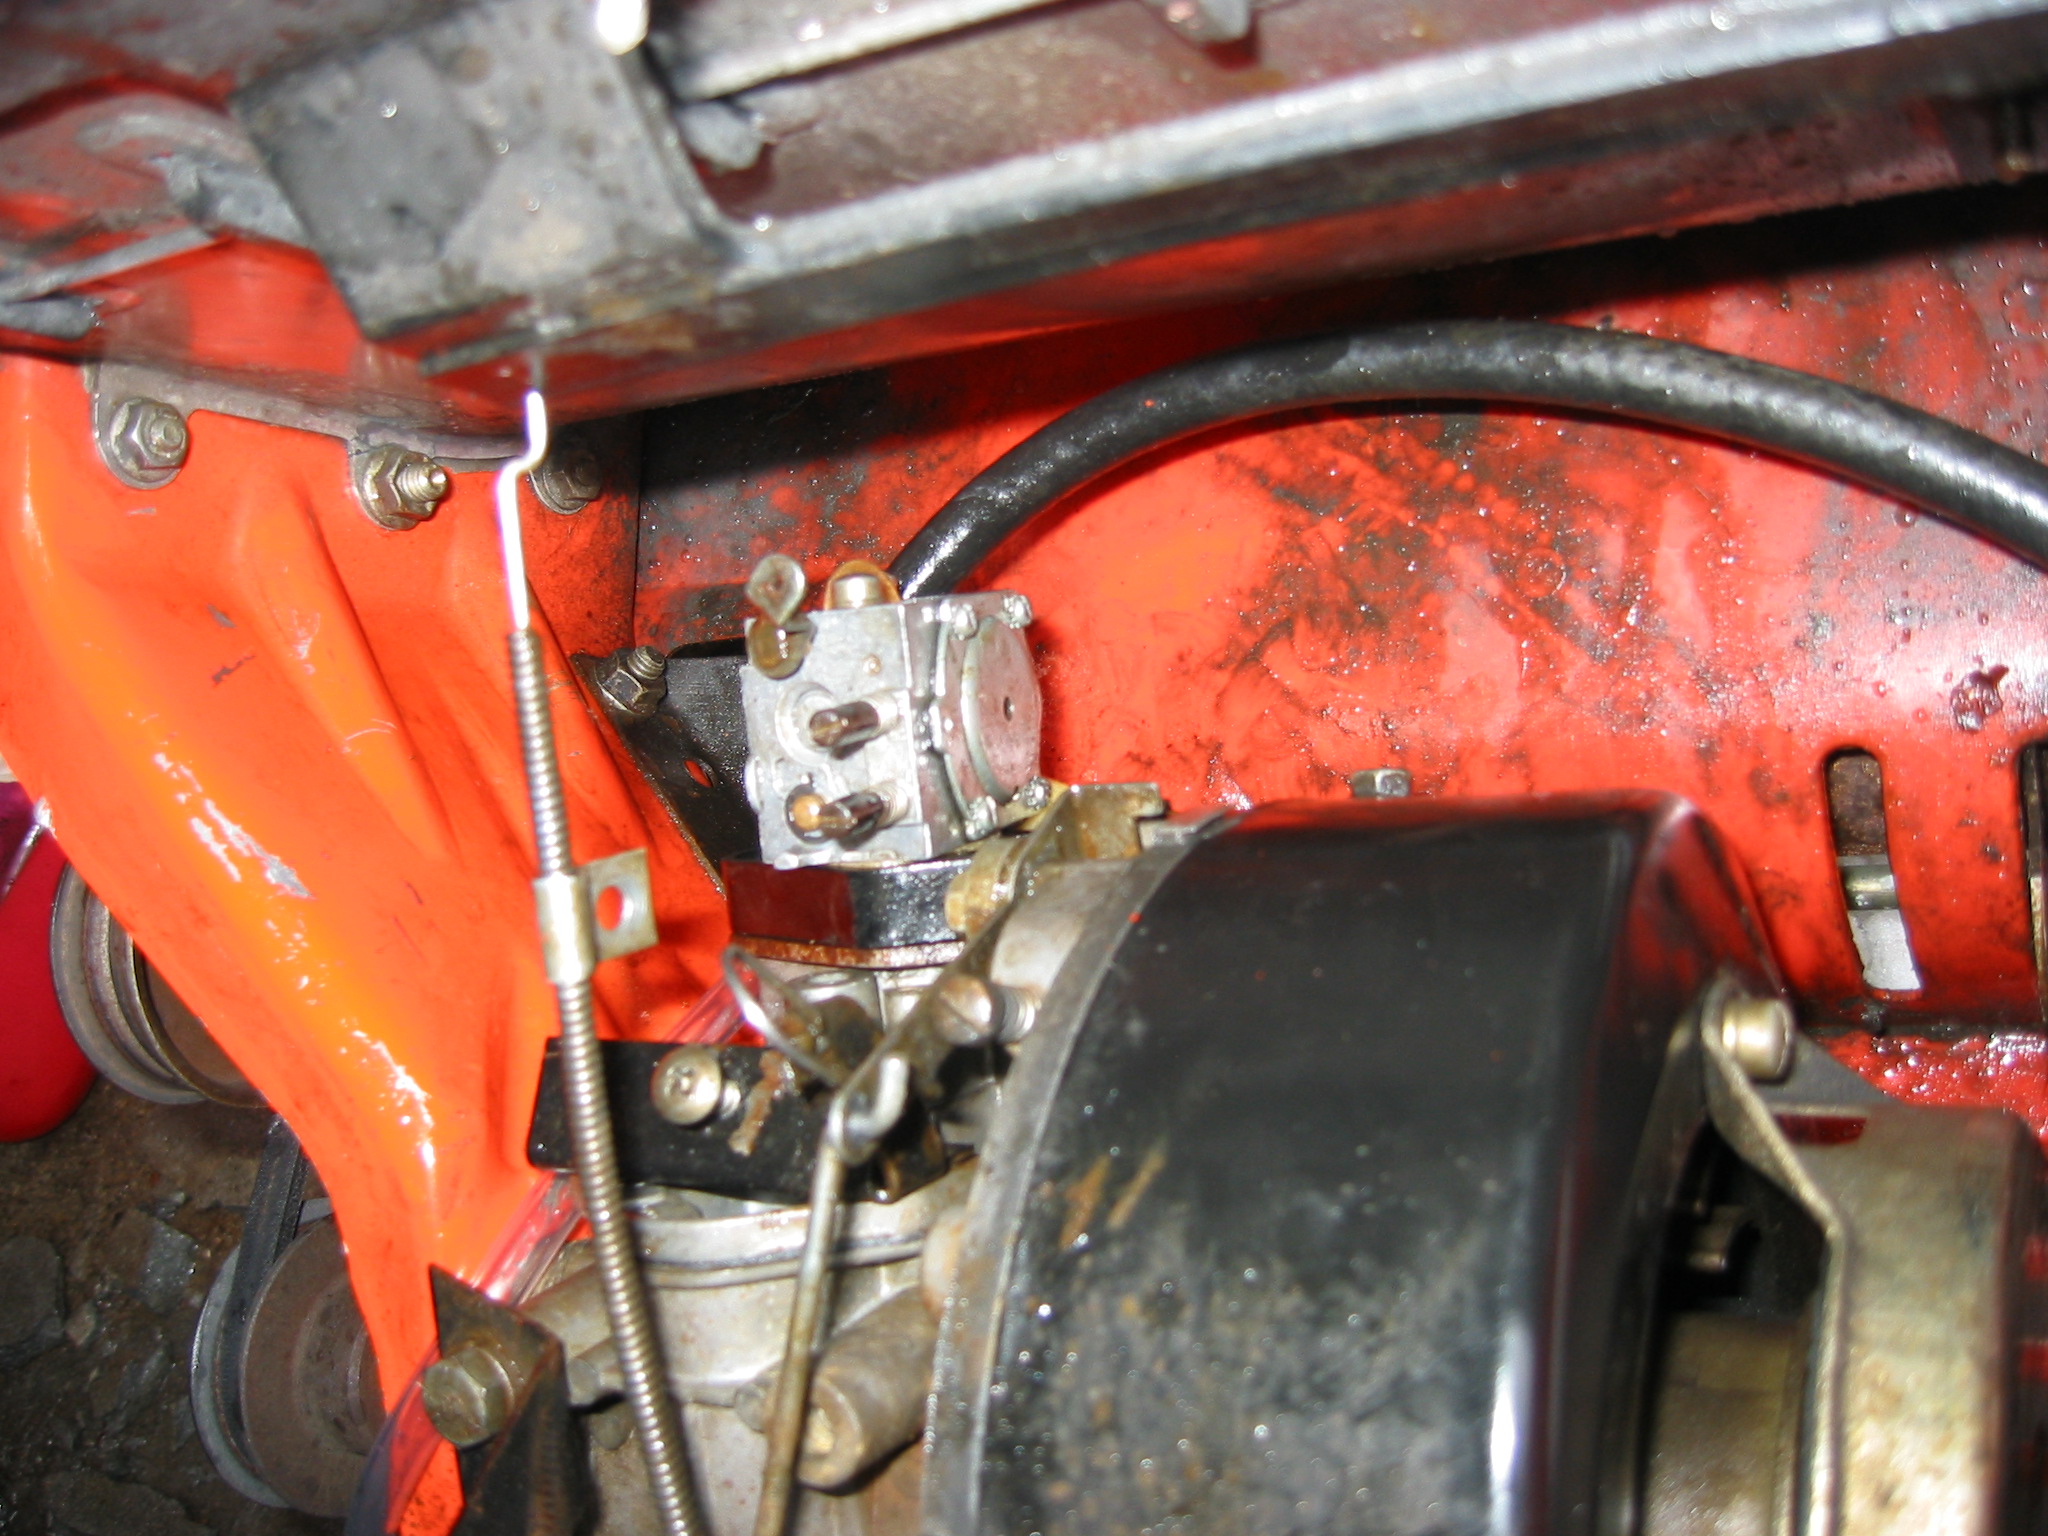
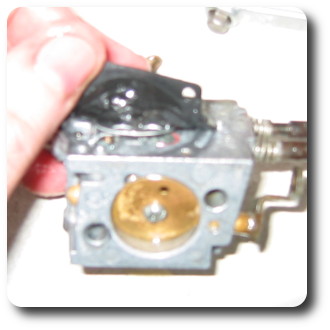
On the right side, the diaphragm cover is in the way.
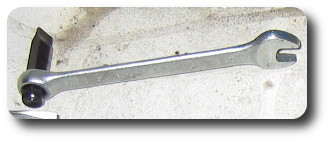
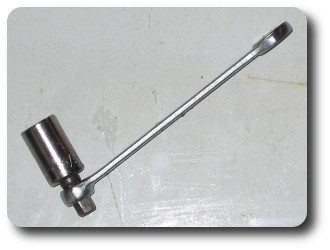
There isn’t a lot of room to work around the engine so getting the galley cover off required the use of a simple jig of a 3/8″ box-end wrench and a flat-blade screwdriver bit from my hand impact driver.
Once the galley cover was off, there was just enough clearance to fit a socket over the left-hand flange bolt.
To remove the diaphragm cover, I used the long, flat-blade screwdriver that I use to tune the carbs on the bikes. Once the diaphragm cover is off, there is clearance to get a socket over the right-hand flange bolt as well.
Although you can get a socket on the bolts, there is no way that you’re going to get a socket wrench in the tight space, so once again I used a little jig. This one is a 1/4″ wrench, a 1/4″ hex-to-square adapter for a multi-bit screwdriver, and a 1/4″ drive, 3/8″ socket for the bolts.
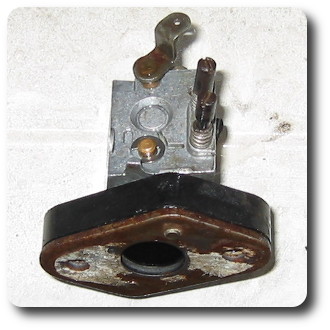
Once you’ve got the bolts out, you may think you’re home free … but you’re not. The automagic throttle is still connected to the bottom of the carb. The linkage between the vacuum actuated throttle and the carburetor is flexible plastic, so you can flip the carb over with it still attached to get access to the circlip that holds it on.

The circlip is a pain in the ass to get off. A circlip remover won’t even help you as there are no attachment dimples and the ends are too far apart to use inverse pliers. I lucked out and after a while one end of mine jammed in its galley so all I had to do was jam my trusty carb-tuning screwdriver into the circlip galley and pry out the other end.

As of now, you should be able to remove the carb from the engine completely and take it to your bench.
Be sure to put the flange bolts somewhere where you won’t lose them.
At this point, you should make sure that both your choke and throttle butterflies work easily as expected. Also, the fuel tap may fall out. This is no big deal as it’s just a press-in part. Just be sure to put it back later.
Before we can really clean anything, we need to get the diaphragm out of the way, mostly to avoid damaging it. I had no intention of replacing the diaphragm, so I used a very sharp knife to slowly work around the edges and separate the diaphragm gasket from the carb surface. This takes time and patience. If you cut or tear the diaphragm, you’re looking at hard-to-find new parts.
Once you’ve got the diaphragm loose all the way around, you’ll notice that it’s still connected in the middle. This is the connection to the “float needle”. You can safely bend the diaphragm back a little bit so that you can see which way you need to slide it to disengage the needle. Don’t worry, nothing is going to fall out.
Once you’ve got the diaphragm off, you can start honestly cleaning the carb. Spray carb cleaner or WD-40 into every hole you can find (you need the straw) and make sure it comes out somewhere else. Pay special attention to the big hole at the bottom of the carb. That nasty brown thing is a fuel strainer. It may fall out on its own; you may need to help it with a wire or screwdriver. Clean it well and make sure the passage below it flows. Don’t forget to put the screen back when you’re done.
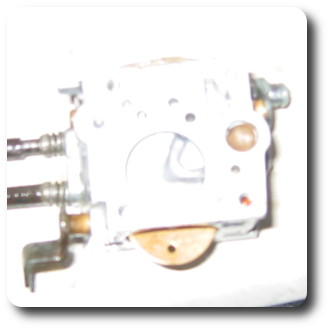
The trickiest and most important (read: likely to get clogged) are the tiny holes in the track above the diaphragm. One of them connects to the “bowl” under the diaphragm. The other connects to the main air passageway where the butterflies are. Make absolutely sure that these flow as they should.
That’s really all there is to cleaning the guts of the carb. If you want to separate the flanges, you can do so by taking out the two big screws by the choke butterfly.
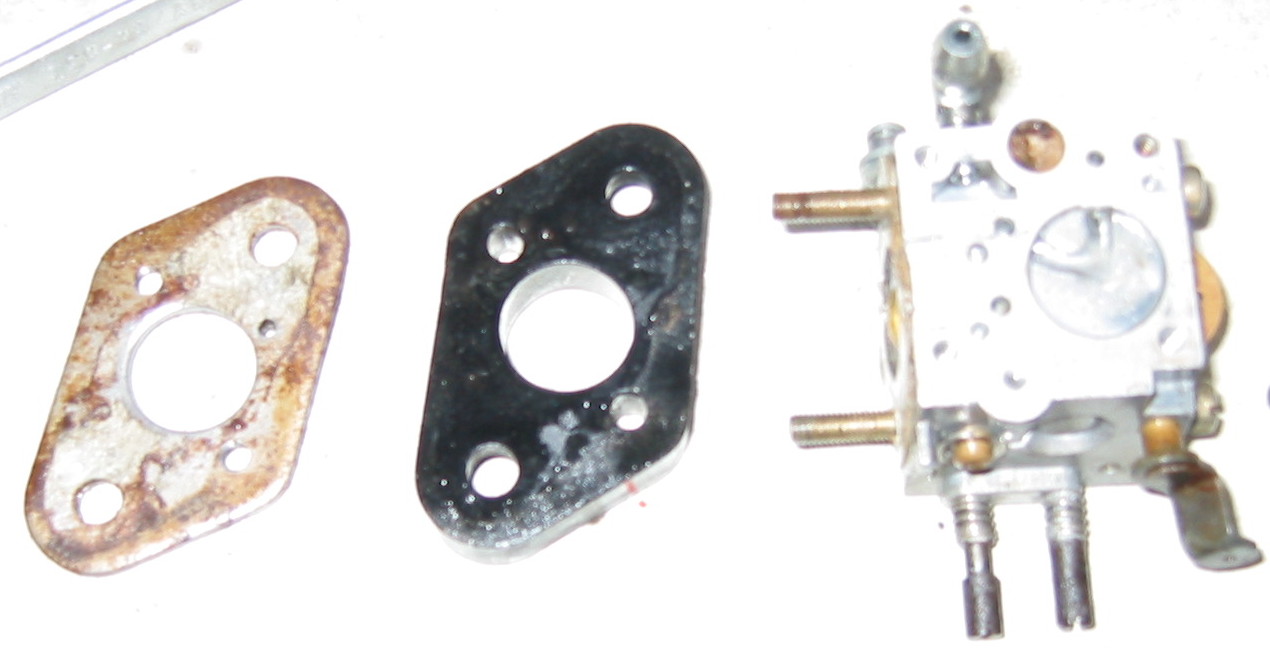
Because of this separation, you can reattach the flanges to the engine first, and then attach the carb to the flanges with the two screws. I didn’t trust myself to line everything up well enough, so I just assembled in the reverse order of removal.
First, I reattached the flanges to the carb assembly.
Next, I reattached the diaphragm to the needle.
Next, I reattached the throttle and circlip taking care to twist the throttle linkage such that it would be properly oriented once the carb was righted.
Next, I righted the carb and bolted it back to the intake with the flange bolts, taking special care not to hurt the diaphragm which is now only loosely attached to the carb.
Next, I screwed on the diaphragm cover using my carb-tuning screwdriver.
After that came the galley cover with the screwdriver jig …
Finally, I reconnected the choke cable and the fuel line. (I forgot to take a picture with the fuel line connected. You get the point.)
Put the cover back on, put some premix in and give her a rip. Mine fired right up and ran like a dream. I hope you can say the same.
Old Comments
Dan on March 2nd, 2007 - 5:14 am
Hey thanks for this man, I have not yet started working on my sno-burst but I am confident now that it will go alot smoother and chances are good it will run when I put it back together. I almost tore into it an hour ago without instructions after reading this I sure am glad I decided against it.
Thanks again Dan Indep, MO
Matt on March 2nd, 2007 - 7:18 pm
Awesome! I needed this to get mine running. I thought i needed a carb kit but i just had the diaphragm togather wrong. Any hints on setting the idle screws? I can fire it up but it has no power. I think the settin screws are off too.
cilynx on March 3rd, 2007 - 8:18 am
I couldn’t find the specifics for this particular engine anywhere on the ‘net so I just went with general small-engine knowledge. The two screws control the fuel-air ratios during the different operating modes. One of them controls the ratio at idle, the other under load. Unfortunately, there are so many variations that I can’t tell you which is which on any given carburetor without a little experimentation first.
Bottom out both screws (not tight, just all the way down), then back them both off by 1.5 turns. Start the engine and if it’ll run, let it warm up at idle. Once warm, pick a screw and start messing with it. Turning the screw in, the engine should eventually bog out and die. Turning it out, it should speed up for a while, plateau, then run either “apparently fine” or it may wheeze and die. The point you want is the farthest in you can go while keeping the fastest idle possible. In other words, turn the screw out from the 1.5 starting point until the engine no longer speeds up when you turn it, then go back in 1/2 turn because you overshot.
If the first screw you play with doesn’t do anything at either end of the scale, put it back to 1.5 turns from bottom and try the other one.
Adjusting the load f/a ratio is a bit harder as, well, the engine has to be under load. Starting with the engine running and warm, the idle screw set, and the load screw at 1.5 turns from bottom, try moving some snow. Listen to and feel the engine. Turn the load screw 1/2 turn out. You shouldn’t notice any change at idle when you play with the load screw. Hit the snow again. If it’s worse, go 1 full turn back in. (This will put you at 1 turn from bottom.) If it’s better, try another 1/2 turn out. Keep playing this game until you come to an equilibrium that you like: If current setting is better than last setting, try 1/2 turn out. If current setting is worse than last setting, try 1 full turn in.
That’s the official theory. Personally, I have found this engine to be pretty much untunable beyond the factory default settings. Both the idle and load screws on mine are at 1.5 turns from bottom and it works just fine: starts first pull in the dead of winter and has a nice growl under heavy load. Also just as a quick reference, as a general rule, the default setting on any 2-cycle engine is 1.5 turns from bottom. The default for a 4-cycle is 2.5 turns from bottom. Those settings should get just about anything running well enough to tune by ear / feel.
Matt on March 13th, 2007 - 3:41 pm
Thanks for the carb adjusting info. It helped alot. I’m thinking the part that the diaphgragm connects to might be bent slightly. When i kill the engine a little gas runs out of the carb through the air intake. sometimes it don’t stop till i pull the start rope again. I found some other info on this carb on another page. It’s on my work computer so i’ll have to post it later if you want the link.
Matt on March 14th, 2007 - 1:18 am
Looks like this carb was used on some kind of powered glider. the carb looks the same though. There are a few settings on this page as well.
http://www.miniplane.com/inglese/manual/carburat/carburazione.htm
Shawn on April 2nd, 2007 - 2:30 pm
This is great information. I look forward to using it to overhaul the carb on the Snow-Burst unit I just got for free this past week. It runs, but is a very rough idle. Does anyone know where it get a carb rebuild kit with all of the gaskets and diaphragm. Does anyone know where to get a free owners manual for this model? I’m not sure if this is normal, but it would not start until I plugged in an extension cord to the underneath 2 prong adapter. Also, trying to figure out how to operate – the choke seems to control the engine speed (rather crude though!).
As it is now spring, I won’t be able to use this until next year, how good of a job does this do in throwing snow (how many feet can it throw).
Thanks in advance for any responses.
cilynx on April 2nd, 2007 - 5:39 pm
I do try to be useful =). As for a carb kit, to the best of my knowledge you can’t get one; it’s not a big deal though as you don’t really need one either. Just be careful when taking it apart and you should be able to reuse everything.
I didn’t know these came with a plug on the bottom. I don’t think mine has one. Mind getting a picture?
The choke should have quite an effect on engine speed until the engine warms up. After it’s warm, the choke should have much less effect. If anything, it should kill a warm engine.
As for throwing snow, it’s no two-stage, but it’s substantially better than I expected. It’ll throw 3″ of powder a good 15 feet to the side or 20 feet forward.
If you’re working with heavier snow like we have here in Milwaukee, take the first full-width pass nice and slow, then take 1/4 width cuts, always having the snow on the right and the clear on the left. Always throw to the right. It sounds like a pain, but you can get going at a good clip and it gets the job done rather nicely.
If you’ve got heavy slush, keeping what you’re working on the right becomes even more important. The drive-belt is on the left and tends to be “lubricated” with the slush getting into the housing.
Welp, that’s my sage advise of the moment.
Shawn on April 28th, 2007 - 1:09 pm
Following up on my previous post from April 2nd.
Initially I thought that my unit was missing an air filter/mesh, but I see your in your pcitures that the opening to the carb is open and exposed as well. Did your take off the air filter for illustration purposes, or did your unit not come with an air filter as well? At a minimun I would think that a wire wesh would be needed to keep out large pieces of dirt.
I tried to copy and paste the pictures I took to show the electronic ignition, but not sure how to do. Please advise how to post pictures to this site.
Thanks.
cilynx on May 13th, 2007 - 7:24 am
Mine was wide open as well when I got to it, but keep in mind, this thing has been through many hands before mine, so I don’t know what was supposed to be there. My plans over the summer involve fabricating an air cleaner as well as an electric start setup. Stay Tuned.
Scott on December 1st, 2007 - 1:40 pm
I’m working on my snow thrower this weekend due to a slow fuel leak while sitting off. I discovered it was coming from the fuel line – carb area so I decided to pull the carb off and have a better look. I have a few tricks to share here.
You can remove the carb without removing the thick intake gasket if you use a double ended – right angle flat screwdriver on the two gold colored screws on the end of the carb. There isn’t much room to work and the screws can’t be completely removed but you can get the carb loose. Cut the fuel line off, I wouldn’t even bother trying to pull it off, it’s really on there and you can damage the fitting trying. Remove the choke cable. Then, and this the trick, use an inspection mirror to see the plastic levers for the governor – throttle advance. There are two levers connected by a pivot point (they snap together with a 90° flange that looks something like this -o- ). Finagle the carb around so the pivot point of those levers can be separated, they just pop apart. Then your carb is free.
The fuel line fitting is just a press in deal, and mine was pretty loose which was apparently causing my fuel leak. To fix this I removed the fitting from the carb and using a small – beveled punch and a vise I lightly tapped the punch into the carb end of the fitting to flare it ever so slightly. Then I pressed, with a few taps of a hammer, the fitting back into the carb. It was much tighter and my leak is gone.
Reassembly is in reverse order and it’s tricky to get those two plastic levers back together, but with some good lighting and patience it can be done.
I’m also having some trouble with the idle and load setting screws, mine wants to rev up and down cyclically all the time. I’m going to try some of the other advice given here to fix that.
G. McNair on December 15th, 2007 - 5:39 pm
This is a lot of great info on the Jacobsen snow thrower and I plan to use it if I need to. I purchased a used one last summer without a manual. Can someone tell me the correct procedure for starting a Jacabsen?
Steve on December 19th, 2007 - 11:59 am
Was that a Tillotson carb on the Jacobsen? For the record, there may come a time when the diaphragm must be replaced due to it becoming hard/brittle…it just won’t pump the gas. I’ve work on a lot of 2 cycle carbs while at Sears in the past, all with similar diaphragms (such as the Walbro carbs).
rob on December 23rd, 2007 - 11:07 pm
i have two they both run fine and as far as the carb goes no air filter is required or screen ,this is a common practice on snow blowers because there is very little dirt its not a lawnmower .the carb maybe a walboro and yes you can get parts
John on December 28th, 2007 - 3:40 pm
Thanks to you both as I have had some difficulty with my old snow blower and the adjustment advise from cilynx, solved my problem. The photos and effort to put this together are great.
Thanks
cilynx on February 2nd, 2008 - 10:09 pm
G. McNair: I don’t know that there is an official start-up procedure, but here’s what works for me:
Cold:
“Burst” off. Choke pulled all the way out. One rip to prime. Don’t expect it to catch. Push choke in ~1/3 of the way. “Burst” on. One rip and she starts. Fiddle with choke (generally having to pull out) to keep it running. Work it back in as the engine warms up.
Warm:
“Burst” on. Choke at half. One rip start. Fiddle with choke to keep running. Work choke slowly down to all the way in.
This last ice storm here in Milwaukee did in my muffler, so now I’m looking at welding it all back together. Maybe time for another photo-tutorial….
Tom M on February 3rd, 2008 - 12:47 pm
I picked up 2 non working Sno-Burst units for free over the last few years. Recently I got them both running. These are a few tips I learned that may help in getting other Sno-Burst to work.
The original sparkplug in both of mine was a Champion UJ-12. They had a gap set at .025 on a 75 year old sparkplug gap tool. The UJ-12 is a discontinued plug and has been replaced by a Champion RJ12C. Auto supply stores and big box hardware stores did not have it, but ACE Hardware did. It is also probably available at small engine repair places.
The first Sno-Burst I got started by taking the carburetor out and draining the fuel form the tank, lines, and carburetor. Turns out the fuel was old and most of the gas had evaporated leaving the fuel as a thick oily substance. The fuel was not old enough to totally clog and varnish the carburetor, but it did not have enough gas left to fire up. After getting the first Sno-Burst to run I started on the second one. This time I drained the tank and fuel line and turned the Sno-Burst on its side with the drive pulley side up. Removed the exposed side of the carburetor by taking out the 4 screws with a very short screwdriver and took off the metal cover. With the cover off I wiped up the oily fuel remaining on the exposed carburetor internals, turned the Sno-Burst over to drain any remaining fuel from the carburetor and reassembled the carburetor. After putting some new fuel in the tank it started up after a few pulls and now runs OK. You might try this shortcut before totally removing the carburetor if the fuel in the tank is thick and seems like the gas has mostly evaporated.
In answering the previous air filter question, it appears there was never a filter on the carburetor. One of my Sno-Burst has a plastic cover that fits over the carburetor to protect it. There is no way to attach an air filter to this original equipment cover.
George on March 3rd, 2008 - 1:35 pm
I have owned three new Jacobsens and they do not come from the factory with an aircleaner. Winter is almost over! :o )
George on March 3rd, 2008 - 1:38 pm
Forgot to add. I may have a manual for my last one. I belive it even has the key taped to it. I scraped it after 15 years. Carb is same as some chain saws and mine developed a problem with the gasket. With jacobsen gone it is hard to find parts.
George R on February 2nd, 2009 - 10:32 am
After reading this thread I was able to get my Jacobsen running. It runs pretty good, however I do have to pull the carb one more time to figure out why the throttle plate is sticking full open and full close. I was able to find a website with Walbro parts and manuals. Thanks to everyone who contributed to this thread. Good Luck.
Chad H. on February 10th, 2009 - 2:02 am
What is the “proper” fuel mixture for this engine? I am working on one of these now and trying to get it running good enough to push what little snow we get here in Indianapolis. Any help would be great thanks.
chad90sami@hotmail.com
cilynx on February 21st, 2009 - 11:48 am
George R:
Congratulations on getting the machine running. Please let us know if you figure out what’s going on with the throttle plate.
Also, many thanks for the links to carb parts and manuals. That’s a Godsend to all of us who refuse to give up on the old machines.
Just in case lawn-parts.com decides to pull their content, I’ve made a backup. I’ll post it if the above links ever die.
Chad H:
According to: http://www.ytmag.com/gardent/messages/51464.html
Use 32:1 gas to oil. The official is 50:1, I believe, but remember, this is an old machine and does indeed need all the help it can get.
Also, some useful info straight out of the manual found on a forum here: http://lmrmpowerforum.yuku.com/topic/932/t/Jacobsen-Sno-Burst.html
For the Jacobsen Sno-Burst initial carburetor settings(alt below 4000 ft.)are: Hi = 1 1/8 to 1 1/4 turns and Lo = 1 1/4 to 1 3/4 turns.
For higher altitudes, subtract approximately 1/4 turn.
Spark plug is Champion RJ12C or equivalent, gap is .30.
Mark R. on August 1st, 2009 - 4:34 pm
Who rocks? You do, Randy, because of this post. You can add me to the list of people who got their 30-year-old Sno-Burst working again. I resigned myself to undertaking this repair after trying 50 different ways to get it started. After taking apart the carb, squirting WD-40 into every hole I could find, and putting it back together, son of a gun! That sputter I heard on the first pull was music to my ears; getting it going on the second pull was a symphony. (My Sno-burst was a freebie I picked up just a few days ago; its previous owner was just another victim of the “it’s too old and probably would cost more than it’s worth to repair” syndrome.)
cilynx on August 9th, 2009 - 8:24 am
I appreciate the kudos. Sorry it took so long for me to get around to approving the comment; lots of real life going on these days.
Glad you got the machine running. I’ve still got ‘welding the muffler back on’ and ‘doing something about the starter’ on my TODO list. However, my wife and I recently moved to a condo and as such don’t have any exterior maintenance responsibilities.
Just below the Jacobsen on the TODO list is an old (free on the curb) Toro that I picked up at the end of last season. It’s one of those plug-in electric starts with all the gears worn down so it doesn’t work. I gave it a couple rips and it almost runs, but then doesn’t. On first inspection, it looks like someone tried mixing in 10w30 instead of 2-stroke oil. As such, it should be another carb job. I’ll do my best to document it as well.
Happy hacking everyone –